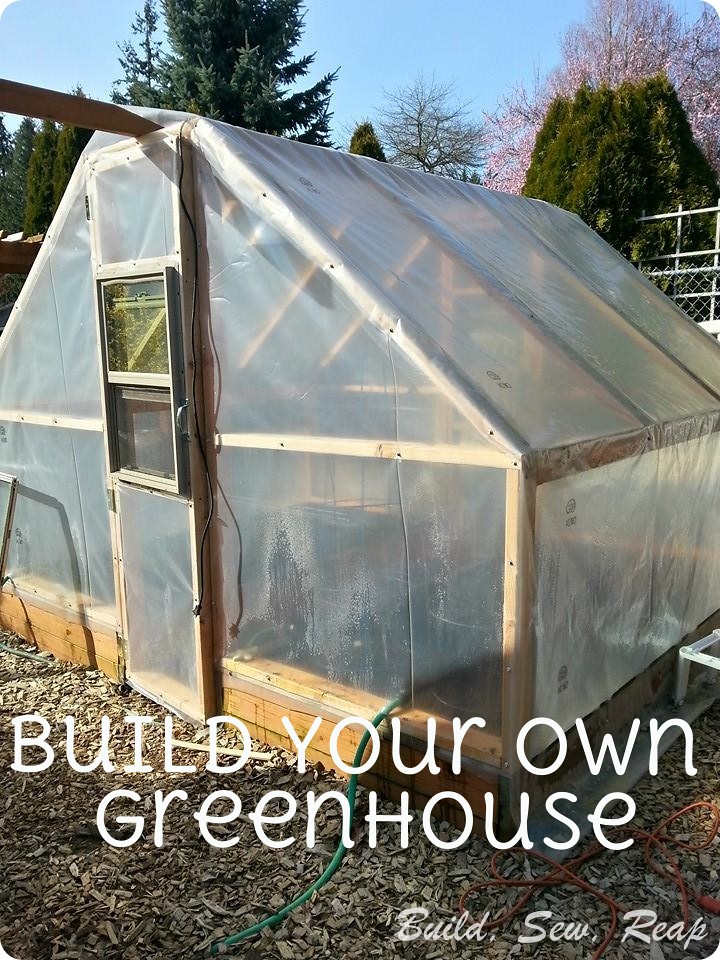
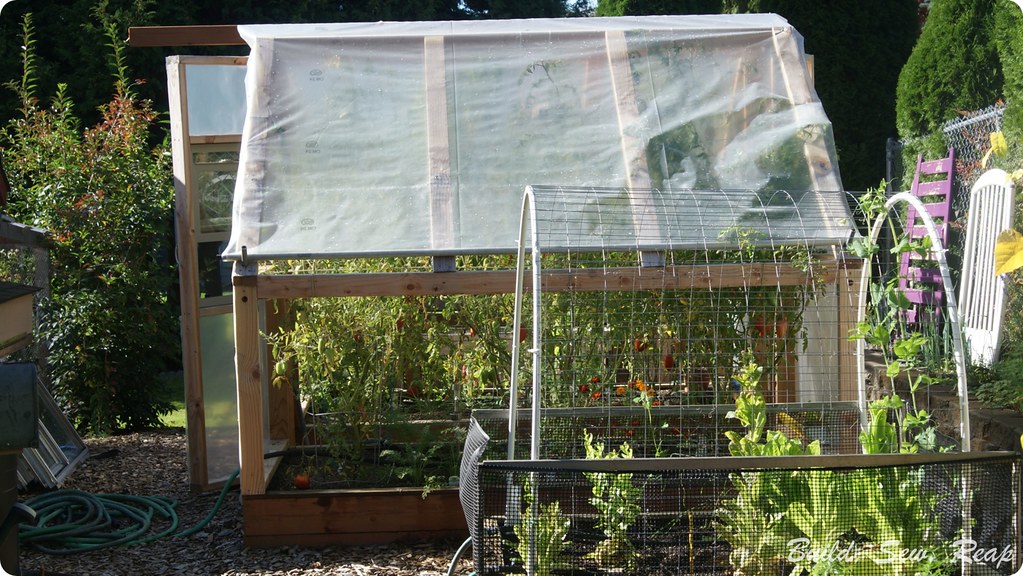
I built the frame out of 2x4s. I don't have measurements at the moment but if I get requests in the comments below, I can write up another post with specifics. The one thing I can't tell you is how to acquire your own windows but they aren't that important anyway. I found these two by the side of the road. They were used as demonstration windows in a manufactured home salesroom. While I did keep them open a lot of the time, I don't think they're necessary as long as you have other ventilation.
Before I move on to just posting a whole bunch of pictures, I wanted to point out that the top of the greenhouse is vented. The whole greenhouse is 8 feet long by 10 feet wide (10 feet on the door ends). I put a very long piece of lumber across the whole top which leaves triangles that aren't covered by plastic open for proper ventilation. If you don't do this, the air will get stale and you'll have a mold problem pretty quickly. Make sure you keep the air moving around, even when it is cold outside.
So, now on to the pictures. I hope these inspire you to build your own greenhouse.
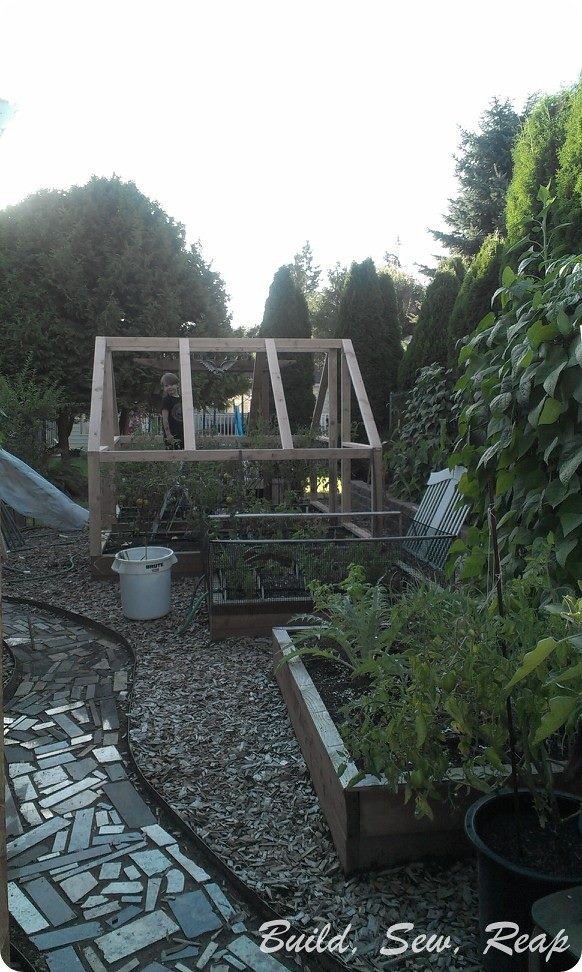
Here's the frame before I covered it with greenhouse plastic (that I ordered online from a greenhouse supply retailer).
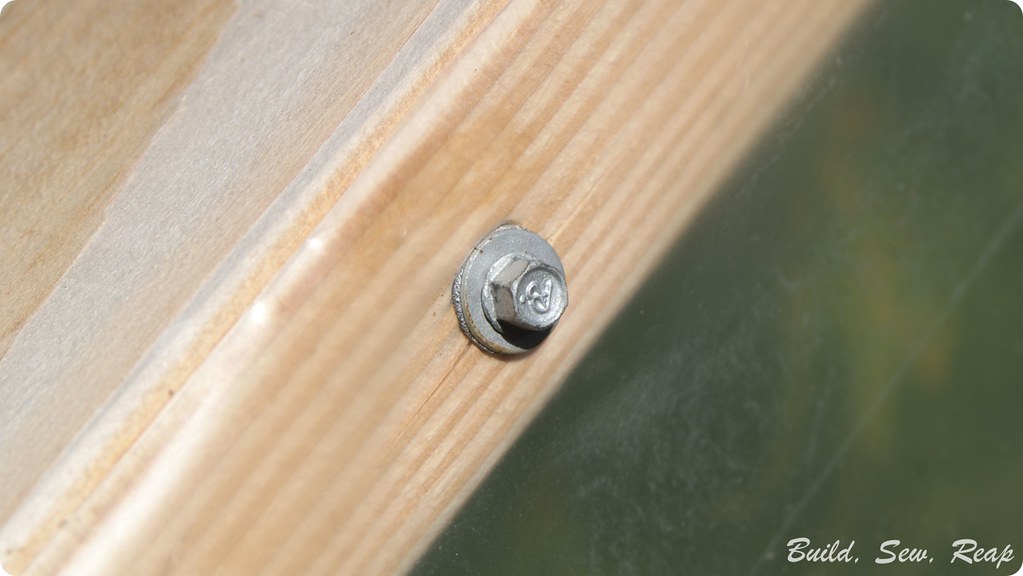
I used some screws I had left over from when we put a new corrugated roof on our back porch. These screws are really easy to use plus they come equipped with a washer that seems to have some sort of rubber backing on it. This greenhouse has now survived two windy seasons in the PNW and this is a particularly vulnerable part of our yard.
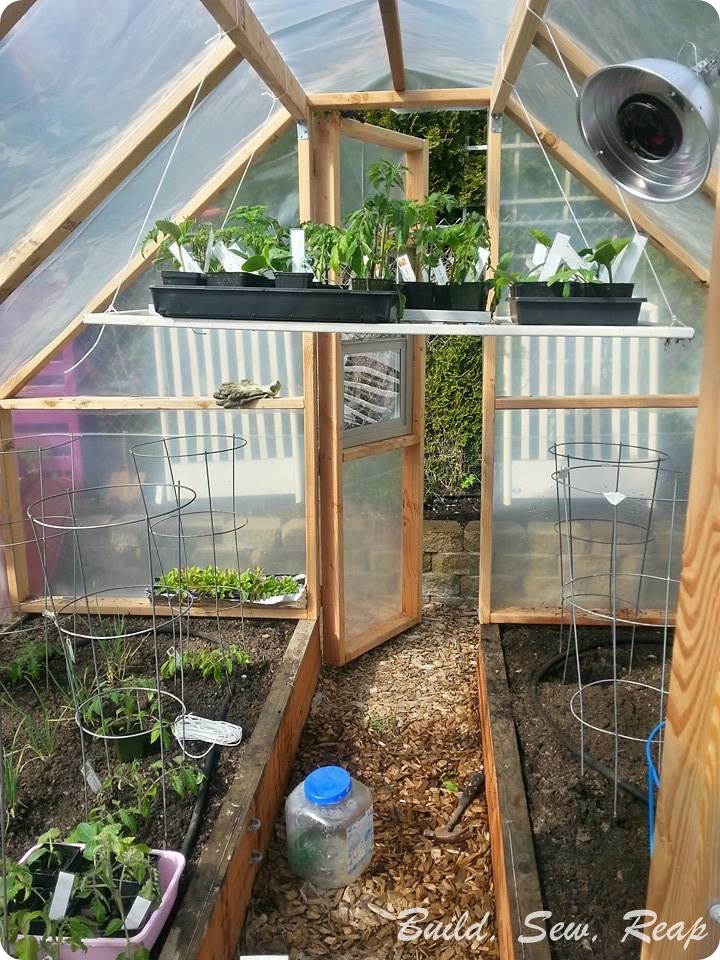
In the spring, I start my seeds indoors in seed trays. Once the seedlings emerge and are strong, I transplant them to 4 inch pots and move them out to the little greenhouse with lots of good plant happy lighting. When I have too many in the little greenhouse, the more mature plants can now be moved out to the big greenhouse. This past spring, we started over 100 plants using this process and most of them grew up to be big and strong. I added a brooder light in the spring when the nights were still dropping down to freezing or below. That kept the plants just warm enough to continue to thrive.
Also, I suspended an old crib side from the ceiling. It served as a great slatted shelf for the plants so the water could drain off but they received lots of sunlight.
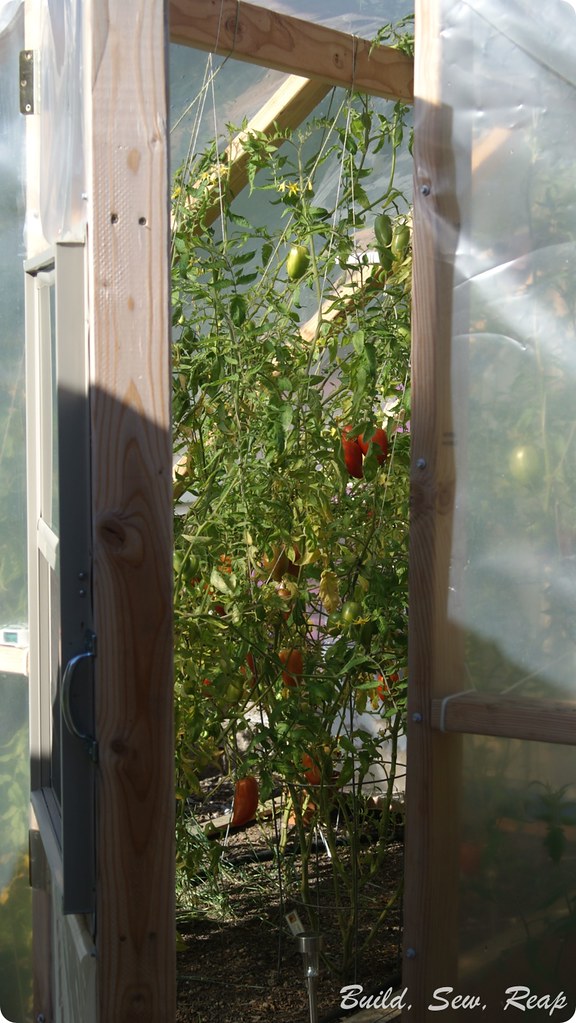
I mentioned before how important it is to keep the air moving inside the greenhouse. Well, in the warmer summer months, I rolled up the sides and opened the doors. My tomatoes LOVED having the protection from the top while still receiving tons of good sunlight and a cross breeze.
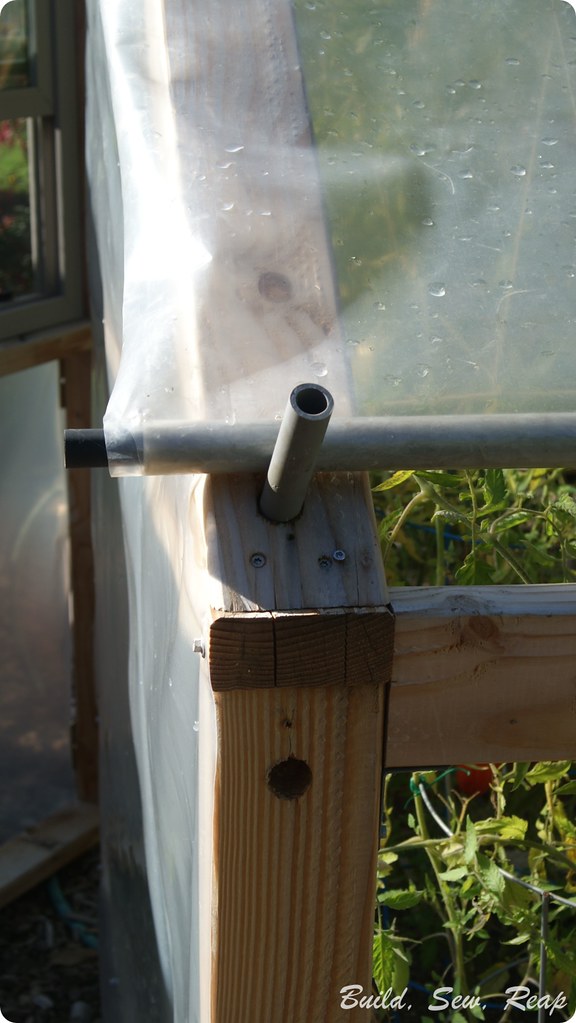
After trying many different ways to hold the sides up, I finally created a casing at the bottom by folding a few inches up from the edge then stapling it in place. I ran an 8 foot length of PVC pipe through the casing to hold the bottom edge straight on each side. Last, I drilled 1 inch holes in my greenhouse frame and cut four 4-inch lengths of pvc pipe to stick in those holes. The little pieces of PVC hold the long side in a rolled up position.
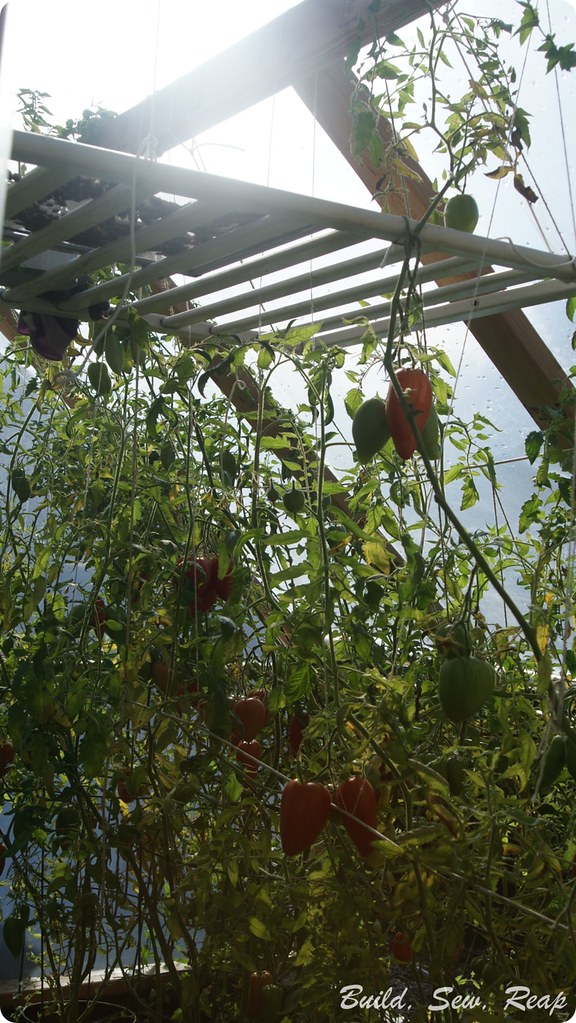
My tomatoes were incredibly happy in there this summer. I've never seen such huge and healthy tomato plants before. I had 12 Striped Roman variety plants that I had started from seed and from those, I harvested more than 100lbs of juicy ripe tomatoes. I probably could have gotten more but I burned out and stopped harvesting fast enough so they started getting blossom end rot. It was an absolute jungle in there though. Truly mind blowing.
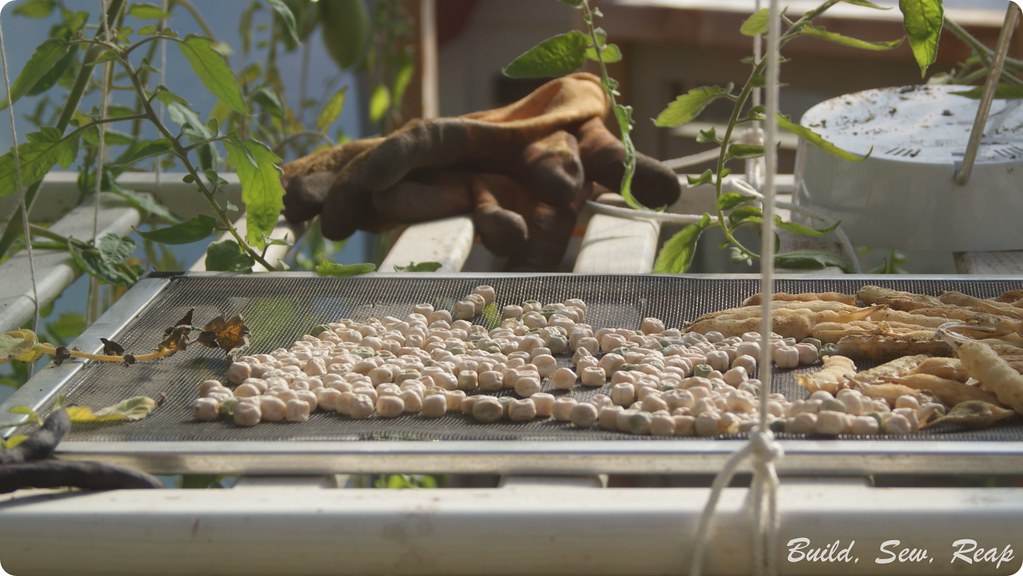
At the end of the summer, I set harvested seeds out to dry on the suspended shelf. It kept the squirrels from stealing my bounty but allowed them to dry out at a natural pace.
I swore I would plant lettuce in the greenhouse for the winter but it never happened. I'm disappointed in myself for dropping the ball on that one but I was exhausted from such a busy summer and I needed a break from gardening. Maybe 2015 will be my year to get a winter garden growing strong.
And now I'll leave you with this vision of summer. It's almost seed planting time again. Are you ready?
Julie



Last year I tried one milk jug of tomatoes, as a winter sowing experiment (I was skeptical! Cut jug in half add dirt, seeds, put outside in snow) . It worked so well that I'll be starting all my seeds that way this year! And I can start some seeds in Feb!
ReplyDeleteDid you do a post about this that I missed? I'm intrigued. I start my seeds in late Jan, early February already but it's a shuffling act for sure. We hope to start even more this year so I'll be getting quite creative in my different growing environments.
DeleteI am planning to start a small investment, and I think a greenhouse will do just fine. From what I have learnt it will provide me with the ability to grow things I wouldn’t otherwise be able to grow. This is a simple structure you have presented in this article, I will try it out. I also found some unique structures here: http://survival-mastery.com/diy/homestead/how-to-build-a-greenhouse.html
ReplyDeleteOverall, politicians are split on the issue of whether Twitter is more for business or personal use. The first thing is the fact that you can build up quite a large following of people. mini greenhouse
ReplyDeleteWow i can say that this is another great article as expected of this blog.Bookmarked this site.. portable greenhouse
ReplyDeleteThe hydroponic systems require less space because the plant roots don't have to spread and search for food and water. The smaller space requirement makes hydroponic gardening perfect for limited space home gardeners. Hydroponic Grow Kits
ReplyDeleteThank you I am glad about the encouragement! I love your site, you post outstanding.
ReplyDeletemoved here
I really enjoy simply reading all of your weblogs. Simply wanted to inform you that you have people like me who appreciate your work. Definitely a great post. Hats off to you! The information that you have provided is very helpful.
ReplyDeletehydroponic growing kits
They listened to the need and offered useful suggestions. home
ReplyDeleteYour articles and contents are encouraging. best web agencies
ReplyDeleteI like how easy this post is to read. Thanks a lot. Use the tips in this Geometry Dash Online profile for quick and smart results. Geometry Dash is a fun and challenging game. The music and colorful levels keep me coming back every time.
ReplyDeleteMy tomatoes were incredibly happy in there this summer. I've never seen such huge and healthy tomato plants before. I had 12 Striped Roman variety plants that I had started from seed and from those, I harvested more than 100lbs of juicy ripe tomatoes. I probably could have gotten more but I burned out and stopped harvesting fast enough so they started getting blossom end rot. It was an absolute jungle in there though. Truly mind blowing.
ReplyDeletepositivity blossom quotes
cricut wine bottle labels
baseball heartbeat tattoo
cricut vinyl cutter
cricut animal designs
cricut desing
cricuit designs