We recently took a vacation to visit my family in St. Louis, MO, for a week. Before heading out, I knew I had my perfect opportunity to paint the rest of the counters so they could cure for that entire week without us being inconvenienced. It was a real treat to come home to. We've since settled back in to using the counters so I opted not to fully stage the kitchen before taking pictures. I figured it would be more telling to see the counters in action anyway.
Just for fun, I'm going to show you a series of pictures of our kitchen from where it was before I started tinkering with it a few years ago to now.
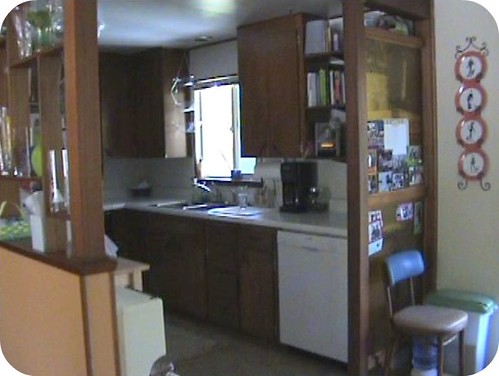
It started here:
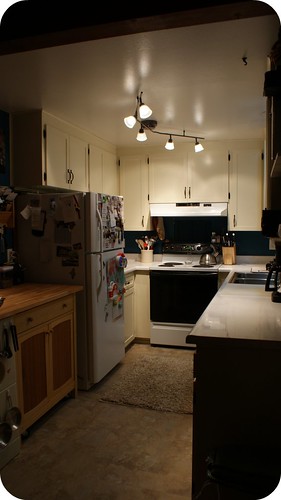
Then in the Summer of 2010, I took it upon myself to refinish the cabinets. That turned into adding trim to the cabinet doors, moving the dishwasher, uninstalling "the amber wall", installing a new light fixture and a myriad of other little tasks but in the end, the change was HUGE:
Then I tried to paint the counters using a paint designed just for that purpose and it was a huge fail. That left me a little cautious about moving forward with any budget fixes to the ugly countertops. They weren't horrible so I convinced myself to just live with them as they were ...
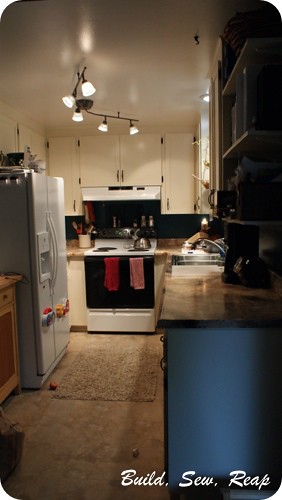
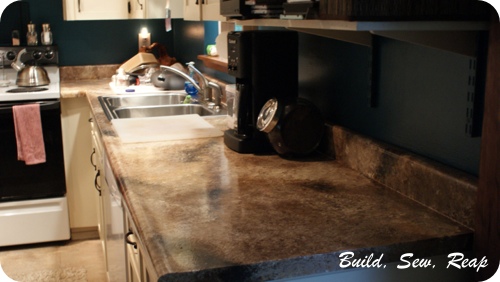
... until a friend painted her counters using craft paint with a glossy topcoat and I couldn't get the idea out of my head. I attacked my counters with wall paint left from other projects and bought a can of Minwax Polycrylic to give it that freshly polished granite shine. The end result:
Yep, I pretty much love the darker counters and I'm really excited to have granite-look counters ... at a glance anyway.
Here's how you can do your own faux-granite countertops.
Oh, and in case you're a detail person and noticed that our fridge changed, yes, I (with a little help) hauled the garage fridge into the kitchen because I decided just a few days ago that I wanted a side-by-side fridge. Added bonus - it has the in-door ice dispenser. Yeah, we're really getting high-tech here.
Thank you for reading,
Julie


No comments:
Post a Comment