Ingredients:
- 1/3 cup coconut oil (the kind that is solid when it is at room temperature)
- 1 Tbsp beeswax pellets (I ordered cosmetic grade off Amazon. Make sure you check your source)
- 5 drops of vitamin E (optional)
- 5-20 drops of essential oil, depending on how strong you want the smell. FYI Tea Tree Oil and Lavender are both anti-bacterial so they're great choices. I did TTO.
- 1/4 cup baking soda
Special Supplies:
- Empty deodorant container
- Plastic wrap
- Ice or flexible ice packs
Fill a small pot with about an inch of water and place your jar of coconut oil in the water before you start heating it. Put the pot on the stove and turn it on high. Once it starts to boil, you'll see the coconut oil begin to melt. Measure out 1/3 cup in a thick glass measuring cup. Take the coconut oil jar out of the boiling water and put your glass measuring cup in. Add the Vitamin E and beeswax and stir until the beeswax disappears. Add the essential oil and remove from the burner.
Add the baking soda and stir it really well. Set this aside.
NOTE: The following steps are only necessary the first time and if the container you're using is likely to leak. You're just going through the process of plugging the holes this first time and going forward, they should remain plugged so you can just pour in the slightly cooled mixture for future batches.
FIRST TIME:
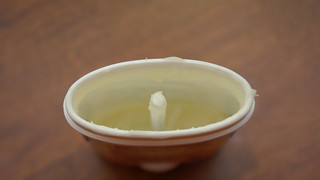
Take your deodorant container and roll the plastic piece all the way to the top and remove it from the center post (I'm assuming all containers work like the two I took apart). Place a piece of plastic wrap over the post.
No need to puncture the plastic. Now place the plastic piece back on.
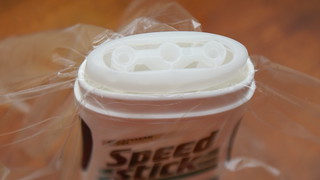
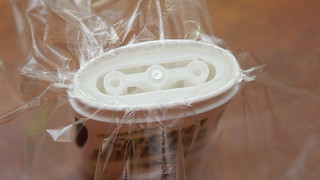
Put the whole thing in the freezer and let that set up.
While that is setting, fill a bowl with ice and water and set the measuring cup in it. Don't submerge it completely, just make sure it is far enough in the water to begin cooling the mixture. Stir constantly, or as much as you can handle. The mixture will start to solidify and you're keeping the baking soda from settling to the bottom.
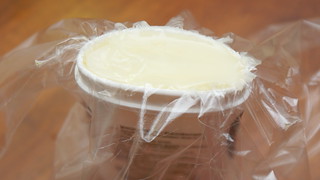
Keep doing this for a few minutes, checking on the stuff in the freezer. When that has set (no more finger dents when you touch it but it helps if it is a little bit moldable still), you're ready to fill it the rest of the way with your cooling mixture.
Roll the stick all the way back up again and take out the plastic piece with the deodorant on it. Remove the plastic then put the plastic and deodorant back and start rolling it down.
Roll it all the way to the bottom.
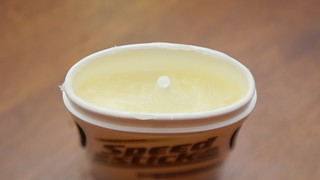
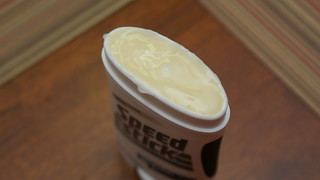
Stir the stuff in the measuring cup one last time. It should be a thick but pourable consistency at this point. Pour the mixture into the deodorant container.
Now you can either put the lid on and toss it in the freezer (standing upright) or allow it to cool to room temperature over night. I was way too impatient to wait over night so I solidified mine in the freezer. In about a half an hour, it'll be ready to use but won't be fully set for a few hours in the freezer or over night at room temperature.
Warning - although it won't likely completely melt, this is probably best stored at around 70 degrees or less. I've taken it into the bathroom with me to put on right after my shower and it was pretty soft when I went to use it so now I just leave it on the dresser in the bedroom.
I feel so much better knowing I'm not putting scary chemicals under my arms every day and like I said, this is the only deodorant that even works right now.
Do you make any of your own beauty products? I'd love to hear what has and hasn't worked for you.
No need to puncture the plastic. Now place the plastic piece back on.

Gently press it into place and roll it down to just below the top edge.

Go back to your measuring cup of melted deodorant and stir it a bit to make sure the baking soda hasn't settled. Pour just a little in to the deodorant container, enough to cover all the plastic pieces and to fill in around all the holes. The purpose of this first part of filling it is to seal the holes around the plastic piece so when you pour in the rest later, it doesn't just run right through.
Put the whole thing in the freezer and let that set up.
While that is setting, fill a bowl with ice and water and set the measuring cup in it. Don't submerge it completely, just make sure it is far enough in the water to begin cooling the mixture. Stir constantly, or as much as you can handle. The mixture will start to solidify and you're keeping the baking soda from settling to the bottom.
Keep doing this for a few minutes, checking on the stuff in the freezer. When that has set (no more finger dents when you touch it but it helps if it is a little bit moldable still), you're ready to fill it the rest of the way with your cooling mixture.
Roll the stick all the way back up again and take out the plastic piece with the deodorant on it. Remove the plastic then put the plastic and deodorant back and start rolling it down.
Roll it all the way to the bottom.
Stir the stuff in the measuring cup one last time. It should be a thick but pourable consistency at this point. Pour the mixture into the deodorant container.
Now you can either put the lid on and toss it in the freezer (standing upright) or allow it to cool to room temperature over night. I was way too impatient to wait over night so I solidified mine in the freezer. In about a half an hour, it'll be ready to use but won't be fully set for a few hours in the freezer or over night at room temperature.
Warning - although it won't likely completely melt, this is probably best stored at around 70 degrees or less. I've taken it into the bathroom with me to put on right after my shower and it was pretty soft when I went to use it so now I just leave it on the dresser in the bedroom.
I feel so much better knowing I'm not putting scary chemicals under my arms every day and like I said, this is the only deodorant that even works right now.
Do you make any of your own beauty products? I'd love to hear what has and hasn't worked for you.
Thank you for reading,
Julie
I'm sharing here:
I'm sharing here:


Oooohhh.....I'm so excited to try this! Thanks for sharing!
ReplyDeleteWow, this article really opened my eyes to the importance of credit scores. I always thought it was just a number that didn’t really matter unless I was getting a credit card or loan, but it turns out it affects so much more. The way it explains the different factors that go into your score is super helpful. I’ll be sharing this with friends who are also trying to improve their finances. Read more here: https://expressdebanat.ro/intelegerea-scorurilor-de-credit-ca-o-cheie-catre-libertatea-financiara/
ReplyDelete